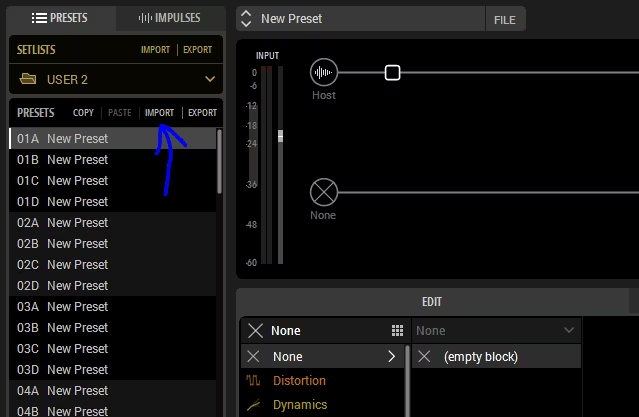
How to install presets, on your Line 6 Helix plugin.
You will receive a “.hlx” file. You import it like this…
If an Impulse Response file (“.wav”) is included in the package you recieved, import it like this…
When you open up your new preset, make sure that the IR block points to the new IR you just imported!
Converting Line 6 Helix Presets to HX Stomp Presets and vice versa
Line 6 announced
HX Unity which means you will be able to move presets between units without modifying the .hlx
files.
I decided to upload some of the notes I made, after reverse engineering the contents of a .hlx file.
Special thanks to the community for testing the converted .hlx files I made and verifying they work.
HX Stomp Limitations:
Stomp is limited to 6 blocks on Path 1 and 3 stomp assignments.
Stomp can handle up to 3 snapshots [snapshot0, snapshot1, snapshot2 ]
Error codes:
• "Target is incompatible": means the json is broken
• "Incompatible target device type": means you have to modify the device number
• "A model used in the preset is not recognised": means you have to rename or remove a block, or update
your firmware
"device number" must be specific and cannot be blank for Native: 2162689, 2162944 for
Stomp: 2162694
Block Renames between Helix Native and HX Stomp
• In stomp we have multiple instances of "HelixStomp_AppDSPFlowInput" but in Native we have
"HD2_AppDSPFlow1Input" and "HD2_AppDSPFlow2Input"
• In stomp we have "HelixStomp_AppDSPFlowOutputMain" and "HelixStomp_AppDSPFlowOutputSend" but in
Native we have multiple instances of "HD2_AppDSPFlowOutput" (same thing twice)